Accessible Heading Structure
The ability to scan web page titles to quickly jump to specific content is something many people take for granted. Those with visual disabilities rely on screen readers, which will read everything in a linear order- except for headings.
Screen readers can jump from heading to heading, providing something closer to a table of contents for those users.
That’s why correct <h1> through <h6> heading structure is essential for website accessibility. It provides a clear, logical framework for both users and assistive technologies.
Without proper headings, screen reader users must read through everything on a web page in a linear order which is time-consuming and can be frustrating. Accessibility software will red-flag heading hierarchy as a serious issue.

Understanding Heading Tag Basics
- Headings range from <h1> (most important) to <h6> (least).
- There should be only one <h1> per page, typically the page or post title.
- Headings should follow a logical, nested order: h1 > h2 > h3, etc.
- Avoid skipping levels (e.g., h1 > h3 without an h2).
- Use them for organization, not visual style.
How to Add or Edit Headings
- Add a new line on your WordPress block editor web page by hitting enter. The default element is the paragraph, or text field.

- Enter your heading text.

- Select the Paragraph icon in the toolbar at the top of the WordPress editor.
In the dropdown menu, select the first option titled Heading.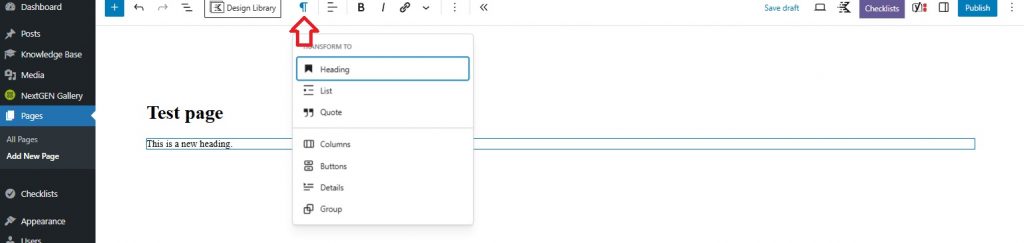
- This will convert the text you just wrote to a heading. The entire line automatically updates, and a heading identifier appears in the toolbar.

- If you want to select a different heading level, click the icon in the toolbar and a menu of heading options will open.

Evaluate Your Heading Structure Visually
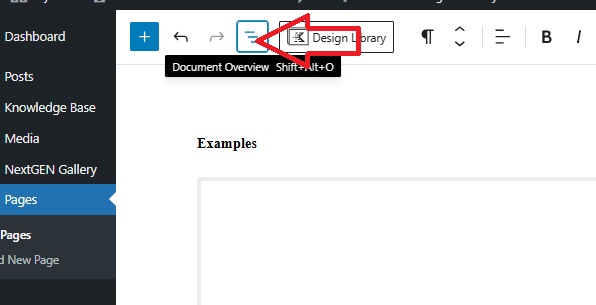
- To evaluate the heading structure of a page select the Document Overview icon of three offset, stacked lines.
- Select the word Outline on the right, and a visual index of that page’s headings will display beneath.
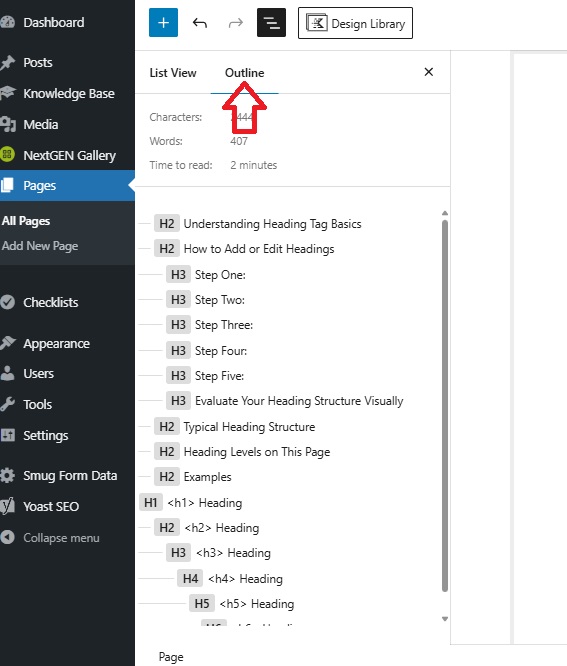
- If any of your headings are out of order, the icon for that heading and title will be highlighted.
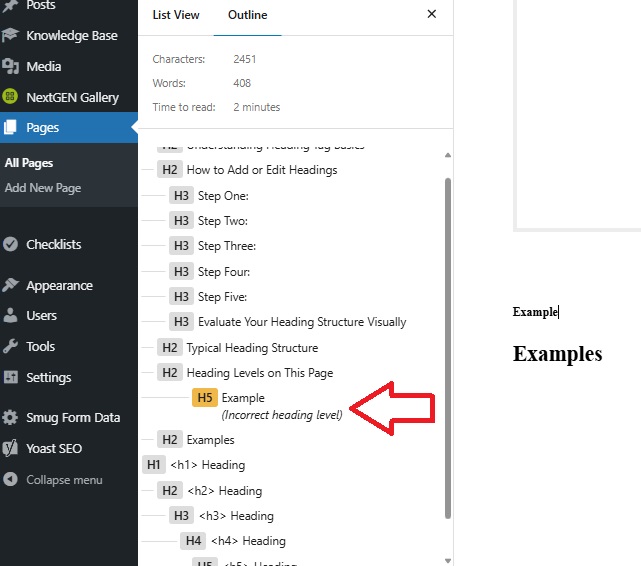
- To change an incorrect heading level, click the icon in the toolbar and a menu of heading options will open.
Typical Heading Structure
<h1>: Page Title </h1>
<h2>: Major Sections </h2>
<h3>: Subsections under h2 Major Sections </h3>
<h4>: Subsections under h3 Subsections </h4> (rare)