Delaware News
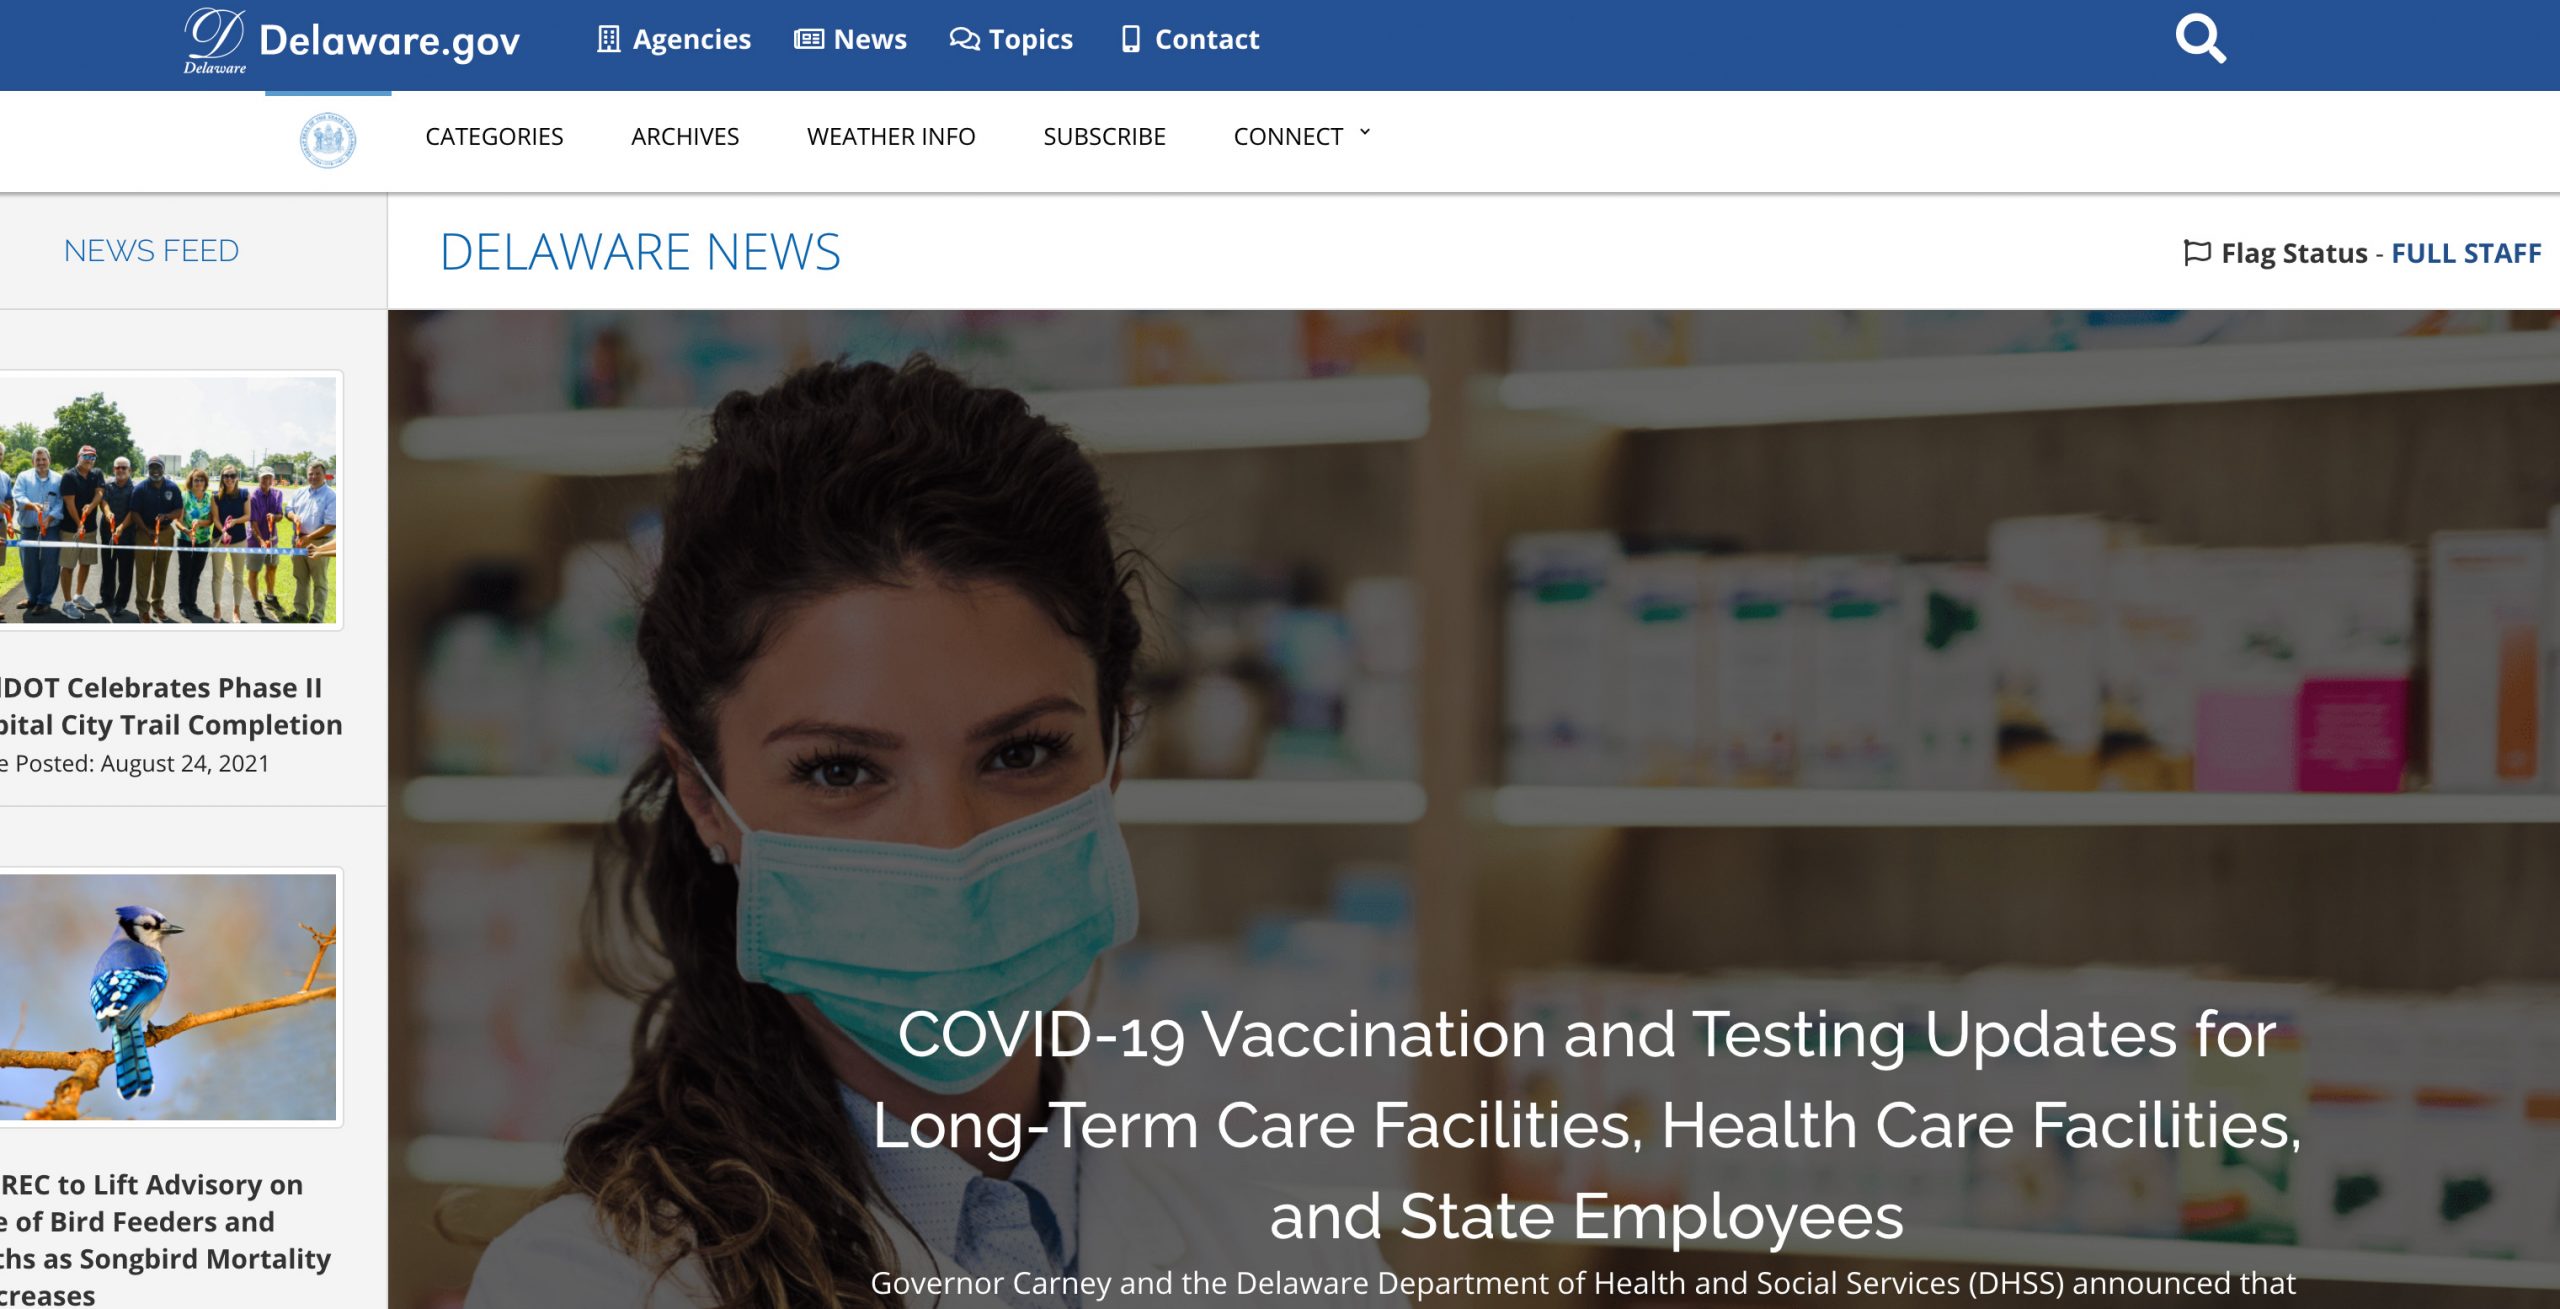
The Government Information Center (GIC) provides state agencies a central place to post news releases. The News Server (news.delaware.gov) is a content-management system based on the WordPress platform that holds, and serves out to agency “Newsroom” pages, standard news releases. WordPress allows for posting from any computer, using a mostly WYSIWYG (What-You-See-Is-What-You-Get) interface. The GIC will provide agencies with code for their web sites to pull headlines from the News Server into their newsroom pages, based on categories applied to individual news release posts (for example, the Department of State newsroom page).

This page provides general guidance on access to, and use of, the News Server. These are basic best-practice guidelines based on observation of usage of the system by state agencies.
Benefits of posting to News.delaware.gov
- Post your press releases where the majority of state agencies are also posting
- Subscribers to news.delaware.gov will receive your press release in a daily digest email (subscribe here!)
- The News Server is a relatively high-traffic site, see the site traffic on analytics.delaware.gov
- Web teams are able to “pull” press releases either by agency or topic into a feed onto your agency website, so you do not need to post the same content in multiple places. Here are some examples:
- You can post photos, embed video content from a streaming service, or other assets into your news releases to add more context for readers.
Access to the News Server
Any state agency public information staff can be granted access to the News Server. Contact the GIC to get started.
Posting News
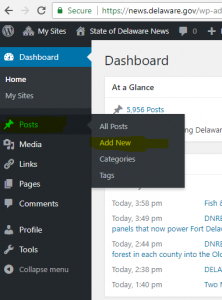
Look for the “+ New” button in the top left portion of the bar at the top of the page or the “Posts” section in the left-hand menu. “Add New” will take you to the “Add New Post” screen. This is where you will do most of your work.
Note: Look for the “Screen Options” tab in the upper right-hand corner. This will open a drawer with items you can check on or off. The items you need to leave checked on on this screen are Categories, Tags, Featured Image, and Excerpt.

Add a Headline
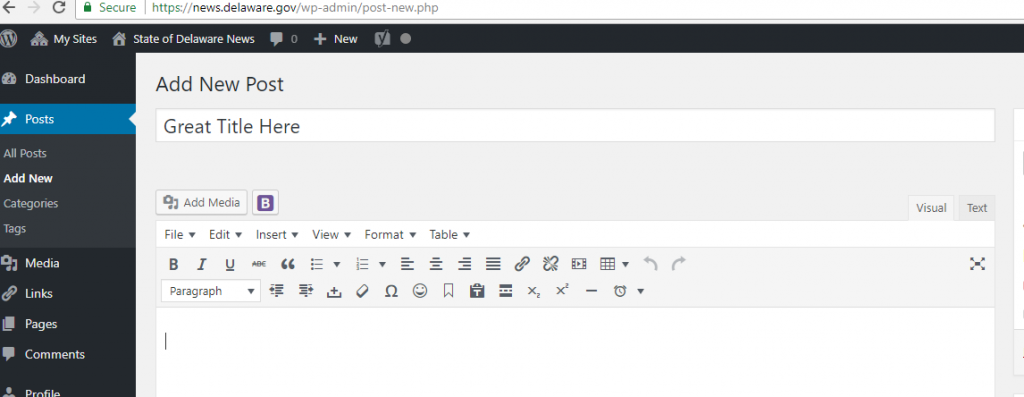
Enter a headline for your news release in the box marked “Enter Title Here.” Do not use all-caps. Do not include “Media Release:” or “Alert:” or anything like that in the headline.
If you use sub headlines, they should be put in the top of the main body of the post, centered, bold, and italicized. You don’t have to add a sub headline.

Enter the Body of the Release
The body of the release is placed in the large “post” box in the center of the page. This is a text-editing box with two possible states, “Visual,” and “Text.” These states are controlled by selecting one of the two tabs on the top right of the text box. The “Visual” state gives you a suite of text formatting tools. The “text” tab will show you just the text with any in-line HTML mark-up.

It is very important that you do not paste text from WORD or any other word-processing software (including Outlook) directly into the “Visual” box in the News Server. This may add extraneous code that can make it very difficult for you to properly format your release. Please paste it into the “Text” tab, then change over to “Visual” to add formatting, links, etc. This is very important and why we are using so much BOLD text here.
Add a Location, But Not a Date
You should include a location at the start of your first paragraph. This should be in bold and followed by a dash. You do not need to include a date in the slug or in your lead paragraph. The date the release was published on the News Server will be automatically a part of the post.
Add Images/Photos
We strongly encourage you to add images to your news release. First, place the cursor at the point vertically where you want the picture to appear. It is usually good practice to put the cursor at the start of the nearest paragraph, before the first word. Then, click on the “Add Media” button between the title and the text window to open the “Insert Media” dialogue.

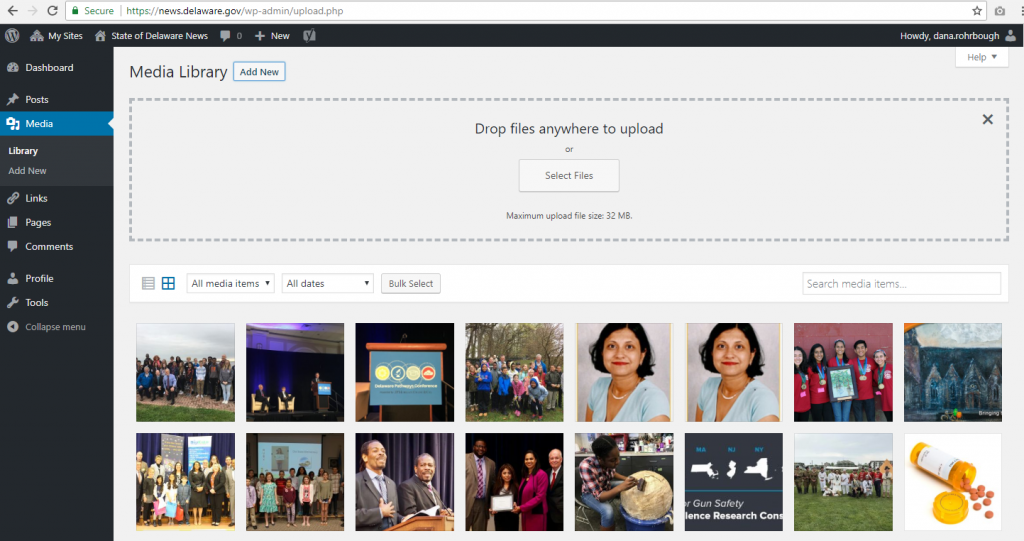
You can upload an image from your hard drive or from another web site (be sure you have permission and give credit). Or you can select an image from the Media Library. This is a library of all the images that have been uploaded by users of the News Server. If it’s an image you’ve used before, you should be able to find it in the Media Library.
When you upload or select an image, an “Attachment Details” section will appear. Please add a meaningful, descriptive title. This title will appear when viewers mouse-over the image on your published news release. You don’t want them seeing “IMG_410.jpg” and wondering what they means. You should also include a description in the “Alt Text” field. This is what will be read to screen readers for those with visual impairments.
Below “Attachment Details” you will see “Attachment Display Settings.” The “Alignment” setting will let you float the image to the left or the right or in the center of the post. The “Link To” setting will make the image serve as a link to a URL, a media file, an attachment page or nothing at all. In the News Server, a custom URL is inserted that is a link to the image, or to a related site, if appropriate. “None” is an appropriate choice, in many cases. Please don’t use “attachment page,” it creates an unnecessary page containing the image. Finally, the “Size” setting will let you choose a size. Medium is usually best.
Learn More About Alt Text:
Click the “Insert into Post” button to add the image to your release.
Add an Excerpt
Remember the Excerpt option you turned on in the Screen Options tab? You now want to add a short excerpt from your release in that text field. This is what will be displayed under your release title on the news archive page and in other venues, such as Facebook. This should be a short news lead. You can use the first sentence of the release, but you may want to edit it to be very crisp, avoiding words like “today” and removing unnecessary titles and names. Short is better.
Add a Featured Image
You can add a “featured image” that will be used as a graphic element in the left scroll of headlines on the News home page. When you add a featured image, it will also show up between your headline and the body content. This image can be one of the images you uploaded to the news release, or it can be a stand-alone image that only shows with the headline at news.delaware.gov
To set this image, make sure that “Featured Image” is selected in the screen options tab (see above). Look for the Featured Image section and click “Set featured image.” This will take you to essentially the same screen you saw when you added an image to the release, just with a few fewer options. You can upload an image or select from those already uploaded. A caption is not needed, but alt-text is important for accessibility for those with visual impairments.

Categories & Tags
Categories and tags add functionality to the News Server tool and make your news releases easier for the public to find and use. They are both important parts of this system.
Add Your Release to a Category
The categories determine which web pages the release is added to using automated posting. More than one can be checked. Categories are set up by GIC staff. If you don’t find one you need, please contact the GIC (gic@delaware.gov).
Select the appropriate category for your release from the list in the Categories box. This should be your OWN agency, unless you have an agreement with another agency for the release to also appear in their news feeds.
Also Note: You don’t need to select “News.” It is a default. And, frankly, everything on news.delaware.gov is news.
Add Tags to Your Release
Tags provide a useful way to group related releases together and to quickly tell readers what a release is about. Tags also make it easier for people to find your content using internet search engines.
Now You Are Ready to Publish
A set of publishing tools is included in a box that will either float on the right side of the post editing window or somewhere below the post editing window.
Save as a Draft
You should save your release as a draft first, and preview it to check for any anomalies. This is also where you can shorten your release’s URL, which you will see beneath the title once you have saved it as a draft. The system will build a permalink using your title; you can edit that to a more manageable URL.

Status & Visibility
Status will be “Draft” until you press “Publish.” You can change a published release back to draft with this tool. Visibility can be changed to private, though you shouldn’t need to do this.
Publishing
Clicking “Publish” will publish the release immediately. There is an “edit” link that will let you change the publication date of a release. This can be handy if you want to post older releases to the system and back-date them. Please confer with GIC staff first, however, as changing this date will not stop the system from auto-posting the release to Facebook and Twitter.
Scheduled Publication
This “edit” link will also let you schedule a release for future publication. Changing the publication date to a time in the future and then clicking on “publish” will schedule the release to be published on that date and time. Please note that the server time can differ slightly from your local clock time. The time you see when you first click “edit” will show you what the server thinks is the current time. If you see an unreasonably large difference, please let the GIC know.
The Posts Page
The Posts Page is accessed using the “Posts” link in the left-hand navigation of the News Server WordPress site (The one you see, not the one the public sees). It will show you a listing of all news releases posted to the system and information including the Title, Author, Categories and Tags applied, and the Date of the release along with its status
If you hover over a release in this list you will see several options: Edit, Quick Edit, Trash and View.
- Edit will bring you to the full editing page (discussed above)
- Quick Edit will give you access to changing the title, categories, tags and other high-level attributes.
- Trash will do just what it says. Be aware that you can see, and effect, everyone’s releases. Don’t trash anyone’s releases but your own. And don’t trash your own unless you have a very good reason. Remember, if a release has been published, it lives on on Twitter and Facebook as well as on your site. So deleting a release causes dead links in several places.
- View will let you view a release.
Customize Social Media Image, Title and Description Settings
You can specify a custom image in your News post that will show up in Facebook and Twitter.
Here is an example on Facebook – this news post about the Port expansion is using a custom image:

The recommended image size for Facebook is 1200 by 630 pixels
And, here is an example of a custom image on Twitter:

The recommended image size for Twitter is 1024 by 512 pixels.
How to Add a Custom Image for Facebook and Twitter
1) Draft your post in News.delaware.gov (this also could be a post or page in your website – if your office is using WordPress for your website).
2) Scroll down to the “Yoast” SEO section underneath your post
3) In the Yoast SEO area, you will see the search engine “snippet”, focus keyword, and the search engine optimization analysis. This section will help your content rise to the top of searches.
4) Click on the “share” icon and this will pull up the Facebook customization tool. Upload your image.
The recommended image size for Facebook is 1200 by 630 pixels
Any other questions?
We realize that this is a lot of information, but we want to give you everything you need to make good use of the News Server. Did we miss anything? Please send any questions or thoughts on improvements to Dana Rohrbough. We’re always looking for ways to do a better job.


